Quarantine had me in the kitchen a lot more, which was a dream. But returning to work and a new reality has meant that some old habits have resurfaced (think frozen pizzas, microwavable burritos, and other loveless meals). This year, as part of my new year’s resolution, I plan to keep myself inspired by trying new recipes weekly, and with that comes new ingredients like lemongrass and ginger. These ingredients can seem like a pain to store and prep, but doing it properly can also help reduce food waste — another part of my “Create More, Waste Less” self-campaign. With these tips on how to handle fresh herbs and aromatics, you can make your culinary goals, whatever they may be, just a little easier.
HOW TO STORE FRESH GINGER
Common in asian recipes, fresh ginger is extremely versatile and a game changer for many recipes. How long does fresh ginger last? In the pantry, it lasts up to a week. But if you keep it in the fridge, it can last up to 2 months. Here’s what to do to make your ginger last longer if you’re not using it right away:
- Soak your ginger root for 20 min in warm water to soften the skin, and peel with the edge of a spoon. You lose less of your precious root that way, and won’t take your fingertips off.
- From there, you have some options. You can store whole in a sandwich bag if you plan to grate it as needed, or mince and store in a recycled glass jar. I use ginger so frequently that I will mince a few roots at once, and add just enough water to cover it.
- Keep in the fridge up to two months.
How do you know when fresh ginger has gone bad?
- Signs of mold: If you notice small specks of mold, cut off that piece and you can use the rest. However, if the moldy spots are big, throw the entire thing a way.
- Change of texture: fresh ginger is somewhat firm so if it becomes soft or mushy, just let it go.
- Change of color: fresh ginger’s flesh is usually bright yellow, so if it turns dark yellow or greyish, discard it.
HOW TO STORE GARLIC
Garlic is common in just about everything, and is absolutely essential. If you want to use fresh, use this hack to peel easily, and store just like ginger. Smash the whole clove, mince, slice, grate, however you like it. Having it prepped and ready saves so much time after a long day.
If you are storing peeled garlic, store the peeled cloves in a tightly closed container in the refrigerator. Chopped garlic will last about a day unless it is stored covered in olive oil which will extend it to two or three days.
If you store a whole head of unpeeled garlic, it will last close to six months, if it is stored in an open container like a hanging wire mesh basket (best option), a mesh bag or even a paper bag in a dark and dry place. Avoid putting the whole garlic in closed containers that won’t allow it to breathe. Otherwise, it will produce moisture build-up in the closed containers and cause the bulbs to degrade faster and produce mold.
You’ll know when the garlic has gone bad if there are:
- Signs of rot or patches of discoloration.
- Little green sprouts or growths. This is not poisonous, but the garlic won’t taste the way you expect it to.
- If the garlic is soft when you squeeze it. Garlic should be firm and crisp.
- If it’s gone more yellow than it is closer to white.
If you see any of the above, please toss it out.
HOW TO STORE STALK HERBS:
There’s a number of reasons why fresh herbs go bad. Too much moisture on the leaves turns them slimy, too little can dry them out; excess light can turn them yellow, while excess oxygen can turn them brown. Follow these steps and your herbs’ shelf life will extend to a week or two.
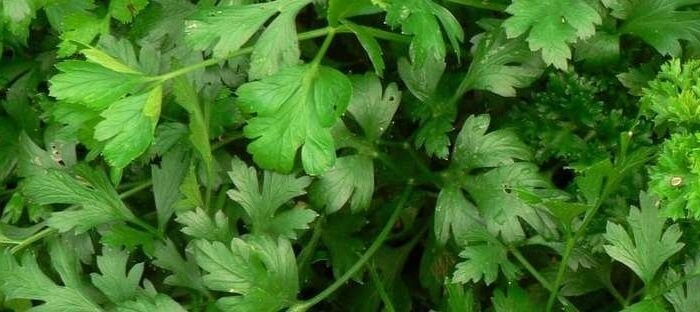
Stalk Herbs (Parsley, Cilantro, Basil, Oregano, et al):
- Store your patch of herbs in a small glass of water in the fridge like a delicious bouquet. This will keep your little branches alive for a few days until you’re ready to use. Cover loosely with a plastic bag to help retain moisture in the dry environment of the refrigerator and keep too much oxygen from browning the leaves.
- If they start to turn before you’ve gotten a chance to enjoy them remove the leaves and rough chop.
- Store in a small air-tight container lined with a damp paper towel. This will give you a few extra days of freshness. This works for scallions and chives as well.
HOW TO STORE LEMONGRASS
This one can be a little trickier, but I really like to prep this in larger amounts since I can’t get fresh lemongrass at my usual local market. Lemongrass is similar to a green onion in structure (a small bulb that gradually turns into long, skinny leaves) but has a much woodier texture. When bought at the store, it has usually been trimmed somewhat, but the two ends of the plant need to be handled differently.
- The bottom, the soft fleshy bulb can be separated and either minced very finely or chopped in the food processor. Just keep in mind that even when cooked, the texture changes very little. This part can be stored in a little recycled jar or other airtight container and refrigerated.
- The fibrous leaves that are left should be cut into 2-3 inch pieces and stored separately. You would use them like you would a dried bay leaf, simmered in your masterpiece, but removed before enjoying. The larger the pieces, the easier they are to fish out before serving.
Note: I have used the prepackaged lemongrass paste, and I didn’t hate it. BUT it’s overly pricey and lacks the brightness of fresh stalks.
You can tell if the lemon grass has gone bad if it becomes soft, discolored with visible bad spots, or brown and dried out.
As part of my “Create More, Waste Less” New Year’s resolution, I’ve put together some recipes on how to reduce waste when it comes to ORANGES. Check out how to turn overabundant oranges into refreshing cocktails and orange candied peels here!
Written by Olivia Gover